Easiest Way to Make Delicious Instant Pot Hibachi Fried Rice
Instant Pot Hibachi Fried Rice. This is the most viral instant pot hibachi fried rice recipe out there! While I love ordering steak, shrimp, chicken and veggies, my favorite thing at any Hibachi place is the Hibachi Fried Rice that is served at the top of the meal. Who doesn't love a night out at a Hibachi restaurant like Benihana (or Gasho of Japan from where I'm from)?!
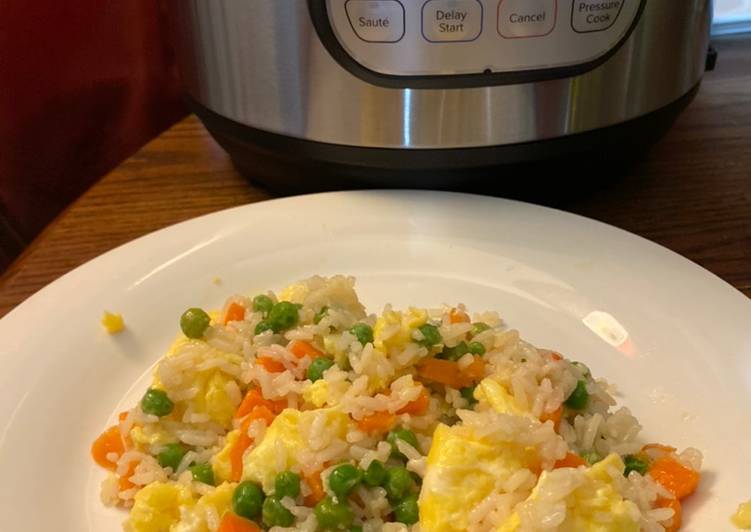 Skip the takeout and whip up delicious pressure cooker fried rice. And this Japanese Hibachi Style Instant Pot Fried Rice recipe is one made at home restaurant quality dish that we keep coming back to again and again. This Hibachi Fried Rice is packed with amazingly savory flavor & has perfectly cooked Jasmine rice, frozen veggies, delicious chunks of scrambled egg. You can have Instant Pot Hibachi Fried Rice using 12 ingredients and 16 steps. Here is how you achieve that.
Ingredients of Instant Pot Hibachi Fried Rice
- You need 1.5 cups of Jasmine White Rice (Rinsed very well).
- You need 1 cup of frozen thawed carrots & peas.
- You need 1 of medium yellow onion finely chopped.
- It's 5 of small eggs whisked.
- It's 1 tsp of regular white sugar.
- You need 2 tbsp of light soy sauce.
- It's 1 tsp of sesame oil.
- It's 3 tbsp of chopped scallions (for garnish).
- You need 6 tbsp of avocado oil divided into equal parts (or use any neutral oil).
- It's to taste of Salt.
- Prepare 1.5 cups of Water.
- Prepare of For the Rice 1 tsp Avocado oil 1/2 tsp Salt.
Hibachi-style fried rice cooked with chicken, green onions, and eggs is a quick and easy side dish to an Asian-inspired meal. One of my favorite parts of hibachi is the fried rice and I was determined to make it at home. This recipe is quick and easy and is sure to be a big hit. This Instant Pot Fried Rice won't have that true Hibachi texture (that's Japanese after all), but the Fried Rice will still be delicious.
Instant Pot Hibachi Fried Rice instructions
- Rinse the rice very well several times under running tap water until clear water runs through. This is very important and prevents the rice from becoming sticky. An excellent way to rinse the surface starch of rice..
- Add the rinsed rice to the steel insert of the Instant Pot along with equal amounts of water, 1 tsp avocado oil or any neutral oil & 1/2 tsp salt. This instantly flavors up the cooked rice & the oil keeps the grains nice & fluffy..
- Close the lid of the Instant Pot, seal the Valve. Pressure Cook on HIGH for 3 minutes..
- Once the pressure cooking cycle is over the Instant Pot will begin to beep. Wait for 10 minutes NATURAL PRESSURE RELEASE and than release the rest of the pressure manually by moving the valve from the sealing to the venting position..
- Carefully open the lid of the pot and gently fluff the steamed Jasmine Rice with the help of a fork..
- Immediately transfer the cooked rice into a bowl or a large plate allow it to cool down and than pop it in the fridge to chill it. In the meantime proceed with the rest of the recipe. Chilling the rice will help you make the best ever Hibachi fried Rice and keep the rice grains nice and fluffy..
- Scramble the eggs Set the Instant Pot on SAUTE and keep it on NORMAL. Add 3 tbsp oil into the steel insert of the Instant Pot..
- When the oil becomes moderately hot add the whisked eggs and do not stir for about 10 seconds. Reduce the heat to LOW..
- Stir the eggs every now and than until they scramble into large chunks. Set aside the scrambled eggs. It’s very important to keep the scrambled egg pieces large. We’ll break them later..
- Make the Hibachi Fried Rice Before you begin assembling the Hibachi Fried Rice set the SAUTE function of your Instant Pot to NORMAL..
- Now, add 3 tbsp oil. When the oil becomes moderately hot add the chopped onions and saute until the begin to become limp or translucent..
- Next, add the thawed frozen veggies like diced carrots & peas (read Notes below). Saute the veggies along with the sugar for about 2-3 mins for crisp tender veggies and saute a little longer for softer veggies. It’s upto you..
- It’s time to mix in the chilled cooked Jasmine Rice. Reduce the Instant Pot Heat to LOW. Mix the rice in two batches. This will help to incorporate the veggies very well with the rice without stirring too much. I always use a spatula and than a fork to mix the rice in stages and I do it gently. As a result the rice grains do not break..
- Once you are done mixing the chilled rice add the sauce and the sesame oil. I love to mix the sauce with the oil and than pour them together. Once again gently mix the fried rice so that each rice grain is beautifully coated with the sauce. A fork always helps to fluff and mix the fried rice..
- Turn off the Instant Pot and add back the scrambled eggs. Before adding them break the larger chunks into slightly smaller chunks about 1/2 or 1 inch long. Gently mix it with the Hibachi Fried rice and enjoy restaurant quality meal with some Yum Yum sauce..
- Fridge: Lasts for 6 days in the fridge when stored in air tight container. Freezer: Lasts for 3 months when stored in portion sized freezer safe bags or containers. Easier to thaw & re-heat..
Plus, for Hibachi Fried Rice, butter is used. And you didn't have to slave over a hot stove. Sesame Oil is super flavorful, so be careful about over doing it! This is a very simple and light fried rice that isn't doused in oil, has a delicious sesame/veggie flavor and is very satisfying - especially with some homemade Japanese mustard sauce And the best part? Thanks to cooking it in your Instant Pot, your clothes won't smell like you just exited a Hibachi sauna!
0 Response to "Easiest Way to Make Delicious Instant Pot Hibachi Fried Rice"
Post a Comment